第4回 メールサーバー構築(Postfix+Dovecot+thunderbird)
カテゴリ:Ubuntuサーバー
作成日:2022年11月12日15:24
更新日:2022年11月12日15:36
前の記事 | 次の記事初めに
「送信:Postfix」、「受信:Dovecot」を使用して、メールの送受信ができるように設定する。
DNSレコードの追加・確認
以下の内容をDNSレコードに追加・確認
Aレコードには、サーバーのIPアドレス
MXレコードには、優先度10でmail.(ドメイン)
hostコマンドで確認
$ host -t mx (ドメイン名)
(ドメイン名) mail is handled by 10 mail.(ドメイン名)
設定通りになっていればOK
hostコマンドがなければインストール
$ sudo apt install bind9-utils
Postfixのインストール
パッケージの更新
$ sudo apt update
環境変数 DEBIAN_PRIORITY=lowを渡し、追加オプションを設定する
$ sudo DEBIAN_PRIORITY=low apt install postfix
対話型プロンプトが開くので、それぞれを設定する
再度設定するには、以下のコマンド
$ sudo dpkg-reconfigure postfix
Postfixの設定
/etc/postfix/main.cfファイルを編集(直接ではなく、クエリで)
myhostnameを変更
$ sudo postconf -e 'myhostname=mail.example.com'
home_mailbox変数を Maildir/ に設定
$ sudo postconf -e 'home_mailbox= Maildir/'
任意のメールアカウントをLinuxシステムアカウントにマッピングするため、virtual_alias_maps テーブルの場所を設定
$ sudo postconf -e 'virtual_alias_maps= hash:/etc/postfix/virtual'
ドメイン名の設定
$ sudo postconf -e 'masquerade_domains= example.com'
MTA情報の隠蔽
$ sudo postconf -e 'smtpd_banner = $myhostname ESMTP'
/etc/postfix/main.cfファイルの修正、追加
$ postconf -n
設定内容チェック
$ sudo postfix check
次のエラーが出ても無視する
postfix/postfix-script: warning: symlink leaves directory: /etc/postfix/./makedefs.out
Postfixの再起動
$ sudo systemctl restart postfix
telnetで送信テスト
telnetがインストールされているか確認
$ apt list --installed | grep telnet
なければインストールする
$ sudo apt install telnet
telnetコマンドでSMTP接続を実行
$ telnet localhost 25
正常接続できればステータスコード220が返却される
Trying 127.0.0.1...
Connected to localhost.
Escape character is '^]'.
220 mail.example.com ESMTP
heloコマンドで応答
helo localhost
問題なければステータスコード 250が返却
250 mail.example.com
mail fromコマンドで送信元のメールアドレスを指定
mail from:(ユーザ名)@(ドメイン名)
250 2.1.0 Ok
rcpt to: コマンドで実際に確認できる送信先を指定
rcpt to:hoge@test.com(送信先のメールアドレス)
250 2.1.5 Ok
場合によっては以下のようにうまくいかないことがある
451 4.3.0 <(送信先のメールアドレス)>: Temporary lookup failure
Linuxを再起動すると対処できた
メール本文を入力する
data
Hello World
本文入力後、`.` で入力でメール作成を終了
quitコマンドでSMTP接続を解除
受信先のメールボックスを確認する。(迷惑メールボックスも確認)
メールアカウントマッピング
アカウントに、メールアカウントのマッピング
$ sudo vim /etc/postfix/virtual
受信したいアドレスと、受信したメールを振り分けるユーザーを指定します。下記は例としてhoge@mail.example.comをユーザーhogeに受信させる設定です
hoge@mail.example.com hoge
マッピングを適用
$ sudo postmap /etc/postfix/virtual
Postfixプロセスを再起動
$ sudo systemctl restart postfix
ufwでpostfixを許可
$ sudo ufw allow Postfix
Dovecotのインストール・設定編集
受信に必要なDovecotをインストールする
sudo apt install dovecot-common dovecot-imapd dovecot-pop3d
/etc/dovecot/dovecot.conf を変更
# コメント解除 & 変更
listen = *
# 最後尾に追加
disable_plaintext_auth = no
/etc/dovecot/conf.d/10-auth.conf を変更
$ sudo vim /etc/dovecot/conf.d/10-auth.conf
# コメント解除 & 変更
disable_plaintext_auth = no
# 変更
auth_mechanisms = plain login
/etc/dovecot/conf.d/10-mail.conf を変更
$ sudo vim /etc/dovecot/conf.d/10-mail.conf
# 変更
mail_location = maildir:~/Maildir
/etc/dovecot/conf.d/10-master.conf を変更
$ sudo vim /etc/dovecot/conf.d/10-master.conf
service auth {
...省略...
# コメント解除 & 変更
# Postfix smtp-auth
unix_listener /var/spool/postfix/private/auth {
mode = 0666
user = postfix
group = postfix
}
/etc/dovecot/conf.d/10-ssl.conf を変更
$ sudo vim /etc/dovecot/conf.d/10-ssl.conf
# コメント解除 & 変更
ssl = no
# コメントアウト
#ssl_cert = </etc/dovecot/private/dovecot.pem
#ssl_key = </etc/dovecot/private/dovecot.key
Dovecotの設定確認
$ doveconf -n
dovecotを再起動
$ sudo systemctl restart dovecot
dovecotのステータスを確認
$ systemctl status dovecot
続いて、PostfixのSASL認証設定、サブミッションポート設定をし、安全に通信できるようにする
Postfix SASL認証
認証機能を確認
$ postconf -a
cyrus
dovecot
/etc/postfix/main.cf を変更
$ sudo vim /etc/postfix/main.cf
最下部に追加
# SMTP-AUTH
smtpd_sasl_auth_enable = yes
smtpd_sasl_type = dovecot
smtpd_sasl_path = private/auth
broken_sasl_auth_clients = yes
smtpd_recipient_restrictions =
permit_mynetworks
permit_sasl_authenticated
reject_unauth_destination
Postfixの設定確認
$ postconf -n
Postfixの設定チェック
$ sudo postfix check
次のエラーが出ても無視する
postfix/postfix-script: warning: symlink leaves directory: /etc/postfix/./makedefs.out
迷惑メール対策設定(OP25B)を行うためサブミッションポートの設定
/etc/postfix/master.cf を変更
$ sudo vim /etc/postfix/master.cf
# コメント解除 & 変更
submission inet n - n - - smtpd
Postfixを再起動
PostfixのSSL/TLS設定
サブドメインで新たに作る証明書では、エラーが出るため、既存の証明書を使用(ドメインのみ)
/etc/postfix/main.cf を変更
$ sudo vim /etc/postfix/main.cf
最後尾に追加
# コメントアウト(26行目あたり)
# TLS parameters
#smtpd_tls_cert_file=/etc/ssl/certs/ssl-cert-snakeoil.pem
#smtpd_tls_key_file=/etc/ssl/private/ssl-cert-snakeoil.key
#smtpd_tls_security_level=may
# ...省略...
# SSL/TLS
smtp_tls_security_level = may
smtpd_tls_cert_file = /etc/letsencrypt/live/(ドメイン名)/fullchain.pem
smtpd_tls_key_file = /etc/letsencrypt/live/(ドメイン名)/privkey.pem
smtpd_tls_session_cache_database = btree:/var/lib/postfix/smtpd_scache
smtpd_tls_session_cache_timeout = 3600s
smtpd_tls_received_header = yes
smtpd_tls_loglevel = 1
/etc/postfix/master.cf を変更
$ sudo vim /etc/postfix/master.cf
# コメント解除 & 変更
submission inet n - n - - smtpd
# コメント解除
-o smtpd_sasl_auth_enable=yes
-o smtpd_client_restrictions=permit_sasl_authenticated,reject
# ...省略...
smtps inet n - n - - smtpd
# コメント解除
-o smtpd_tls_wrappermode=yes
-o smtpd_sasl_auth_enable=yes
# コメント解除 & 変更
-o smtpd_recipient_restrictions=permit_sasl_authenticated,reject
設定のチェック
$ sudo postfix check
Postfixの再起動
$ sudo systemctl restart postfix
ステータス確認
$ systemctl status postfix
DovecotのSSL/TLS設定
/etc/dovecot/conf.d/10-ssl.conf を変更
$ sudo vim /etc/dovecot/conf.d/10-ssl.conf
# 変更
ssl = required
# コメント解除 & 変更
ssl_cert = </etc/letsencrypt/live/(ドメイン名)/fullchain.pem
ssl_key = </etc/letsencrypt/live/(ドメイン名)/privkey.pem
/etc/dovecot/conf.d/10-master.conf を変更
$ sudo vim /etc/dovecot/conf.d/10-master.conf
無効化させたいポートはコメント解除して、0番ポートを指定する
service imap-login {
inet_listener imap {
port = 0
}
inet_listener imaps {
port = 993
ssl = yes
}
}
service pop3-login {
inet_listener pop3 {
port = 0
}
inet_listener pop3s {
port = 995
ssl = yes
}
}
Dovecotの再起動
$ sudo systemctl restart dovecot
ステータス確認
$ systemctl status dovecot
Thunderbirdで送受信テスト
必要なポートを解放します
$ sudo ufw allow "Postfix SMTPS"
$ sudo ufw allow "Postfix Submission"
$ sudo ufw allow "Dovecot Secure IMAP"
$ sudo ufw allow "Dovecot Secure POP3"
thunderbirdをインストールする

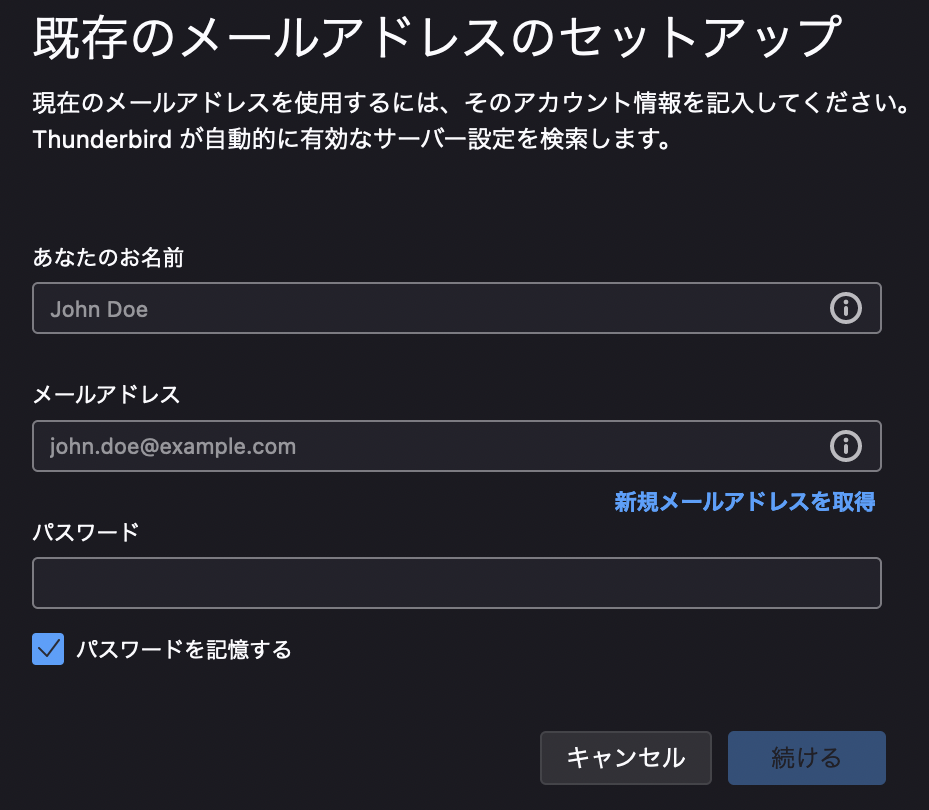
あなのお名前には、Ubuntuのアカウント名(例:hoge)
メールアドレスには、登録するメールアドレス(例:hoge@example.com)
パスワードにはUbuntuアカウント名のパスワード
入力が終わったら、完了を押す。しかし、「Thunderbirdがメールアドレスの設定を見つけられませんでした。」と表示されるので、右下に出てくる「詳細設定」で設定する。
サーバー設定の
送信(SMTP)サーバーの
メールの送受信を確認できたら完了です
お疲れ様でした
参考記事
 前の記事 | 次の記事
